In web design/development classes, you may be assigned use of the web hosting company Reclaim Hosting as well as the web service CodeAnywhere to support web programming.
After you have already created/registered an account with these companies, follow the steps below to connect your CodeAnywhere account to your Reclaim Hosting server.
- Reclaim Hosting: Get Your Server Account Username and Password
- CodeAnywhere: Connect the SFTP Account
- CodeAnywhere: Make and Test a “Hello World” Page
IMPORTANT NOTE
If you have previously set up a web site on Reclaim Hosting, and this is not simply the first time you’ve ever used Reclaim Hosting, then one step of the process will look different. Please pay attention to the highlighted note under the section called Connect the SFTP Account. As always, ask the instructor if you run into problems.
Reclaim Hosting: Get Your Server Account Username and Password
If you currently log into Reclaim Hosting with a username, and not with an email address, then you already have the information you need, and can skip to the next step: CodeAnywhere: Connect the SFTP Account.
However, if you currently log into Reclaim Hosting with an email address, and not with a username, then you need to configure your username and password, as follows.
- Log into the Reclaim Hosting Client Area. You should see your account dashboard, not the cPanel hosting dashboard.
- Under the “Accounts” menu, choose “My Accounts” to see the list of your Reclaim Hosting accounts… which is probably just one item.
- In the list of accounts, click on “View Details”. You will see a screen of information about your account, including a secondary row of tabs to click on .
- In the row of tabs, click on “Change Password”. You will see a screen with your username and a form to change your username password.
- This is your server account password, and is not the same as the password you use when log into Reclaim with your email address.
- Enter a new password here, confirming it in the second box, and click “Save Changes”.
This username and account information is your main server login information, which you need for CodeAnywhere.
CodeAnywhere: Connect the SFTP Account
CodeAnywhere relies on “Connections” to servers so that you can edit HTML, CSS, and other coding files. For your Reclaim Hosting, you are going to configure CodeAnywhere with the server account information.
First, log into the CodeAnywhere dashboard. At the top of the screen, look for a banner that mentions the “legacy CodeAnywhere IDE”, like this:

Click on the button marked “Open”.
If this is your first time logging in, then it should ask you to create a connection using a Connection Wizard screen, like this:

Click on label “SFTP – SSH” on the left side.
Note: If you do not see the Connections Wizard screen, and you don’t think you have any Connections set up, click on the File menu in CodeAnywhere (not in your web browser) and choose “New Connection > SFTP”.
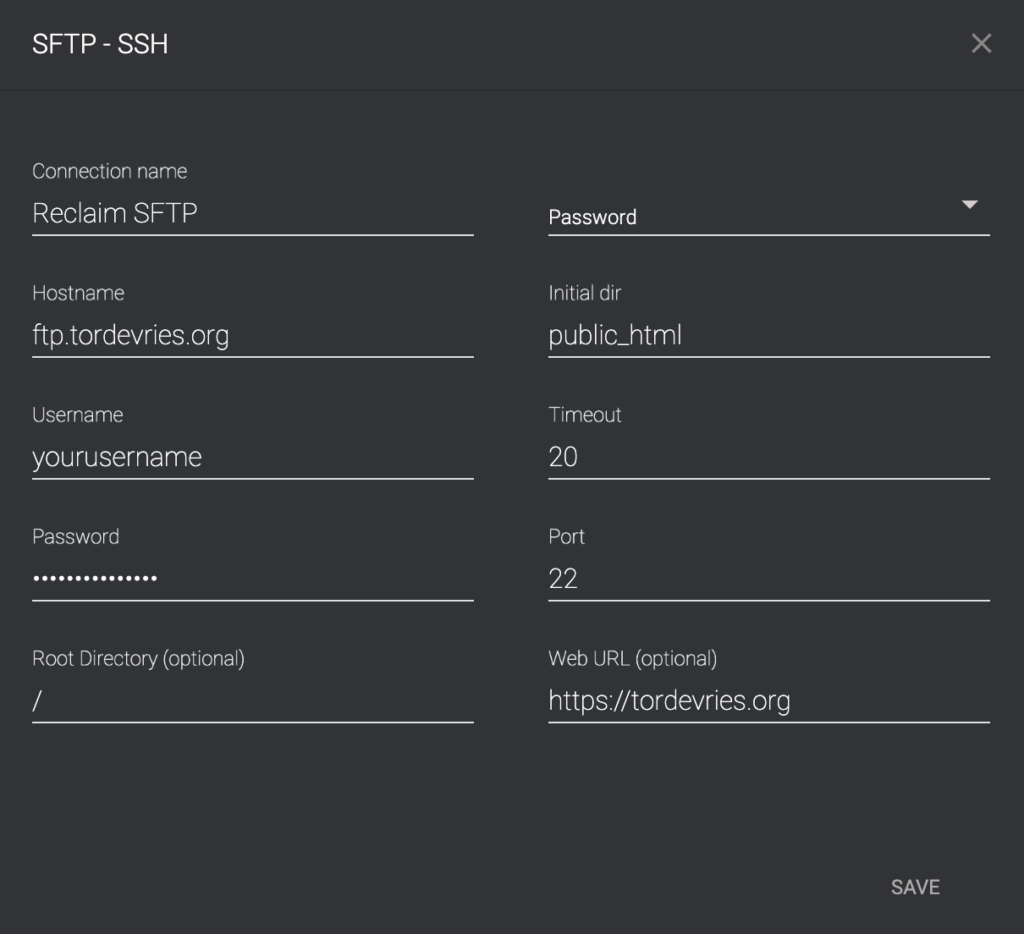
On the SFTP-SSH screen, enter this information:
- Connection name: this is just a reference for you. I suggest entering “Reclaim Hosting” or “Reclaim SFTP” for now.
- Hostname: your domain name. So, if you registered the domain name “YourDomain.org” with Reclaim Hosting, then you would type in “yourdomain.org”. If you are using a subdomain under “.reclaimhosting.com” then type in that.
- Username: the server account username from Reclaim, as reviewed above.
- Password: the server account password from Reclaim, as reviewed above.
- Initial dir: type “public_html”.
- Web URL: type “https://” followed by your domain name. For example: “https://yourdomain.org”.
- Root Directory: type “/” for now, but we will need to update it in the final connection step.
- Leave all other settings at their defaults.
After typing all this, your Connection Wizard should resemble this:
Click on “Connect”. CodeAnywhere will then attempt to make the connection. If it is successful, your screen should look something like this:
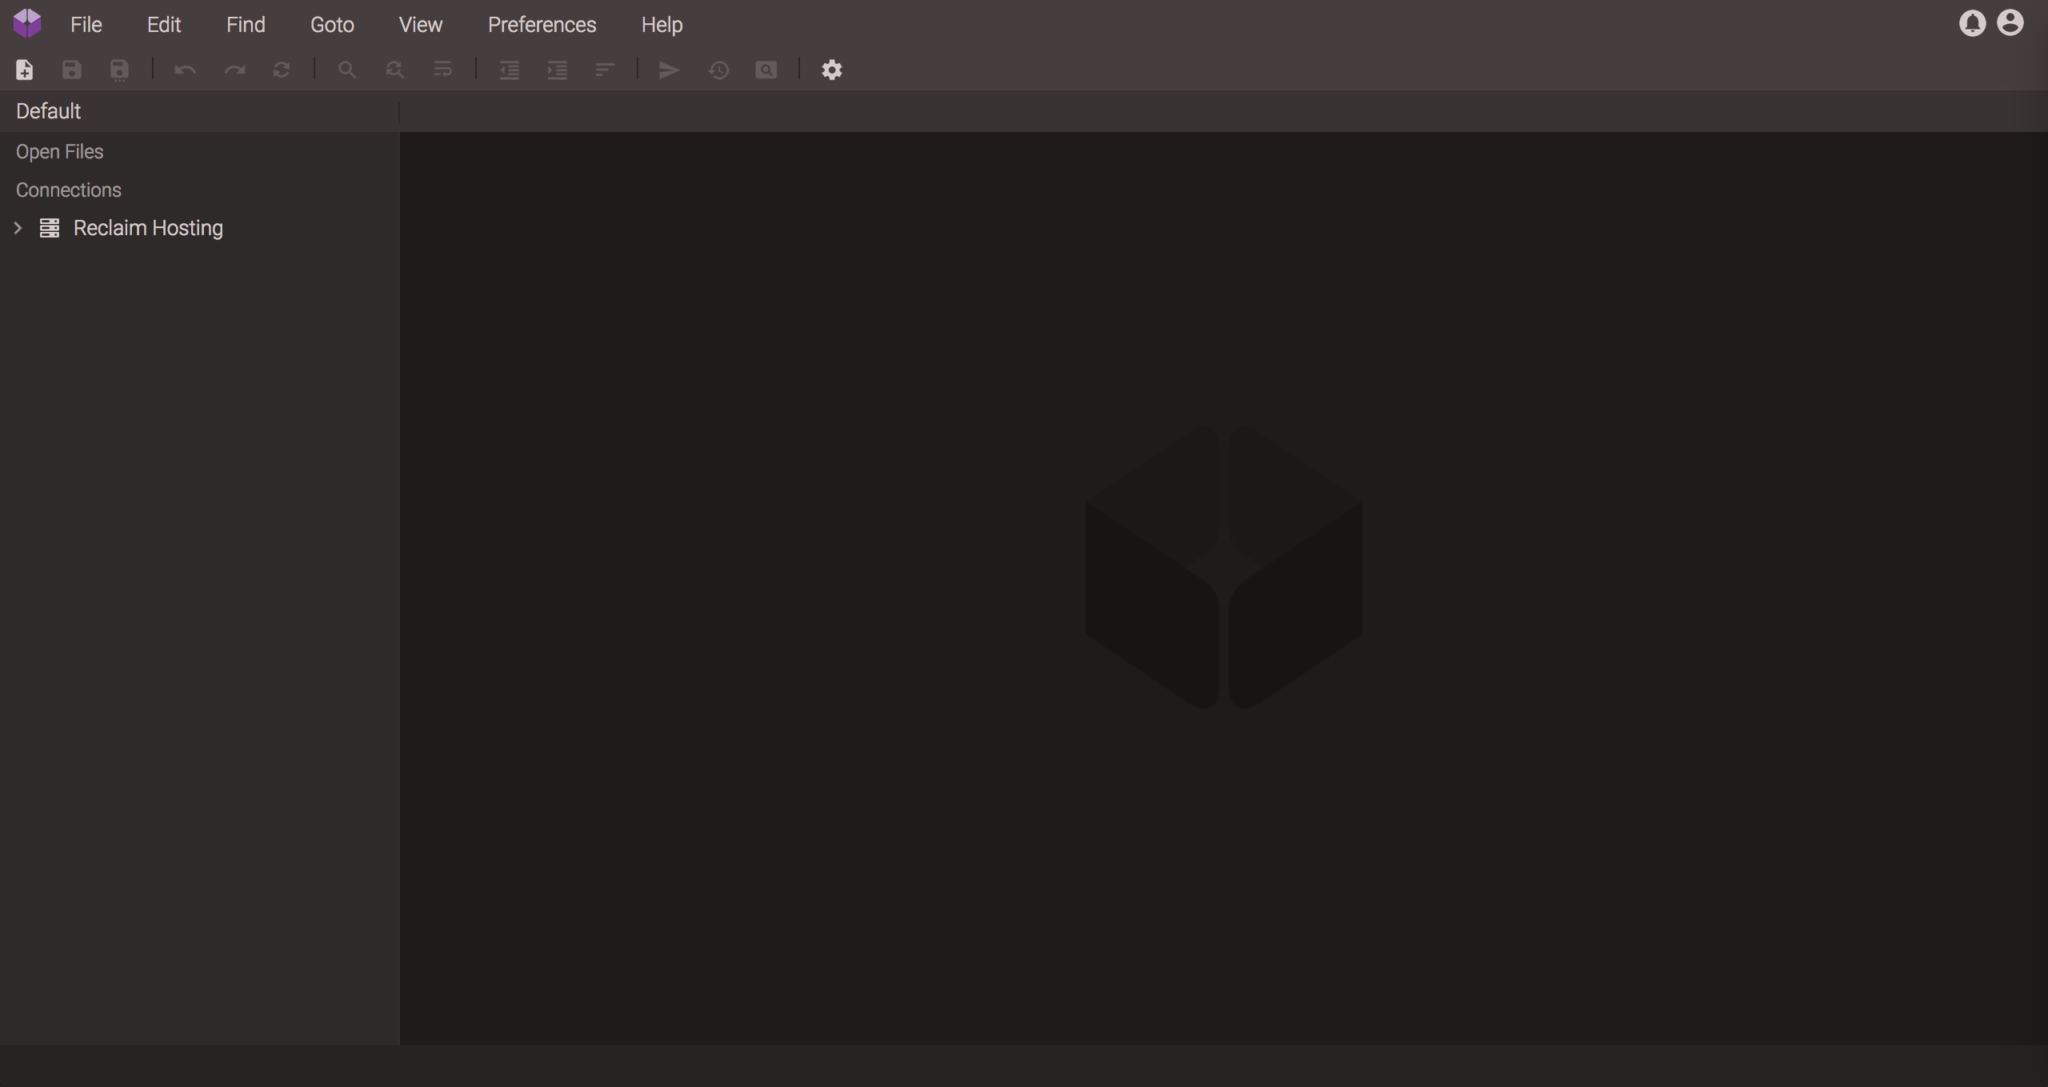
The top horizontal section is CodeAnywhere’s menu and toolbar. The left vertical column will Connections and the files available to you. The large dark rectangle on the right is where you will edit text files.
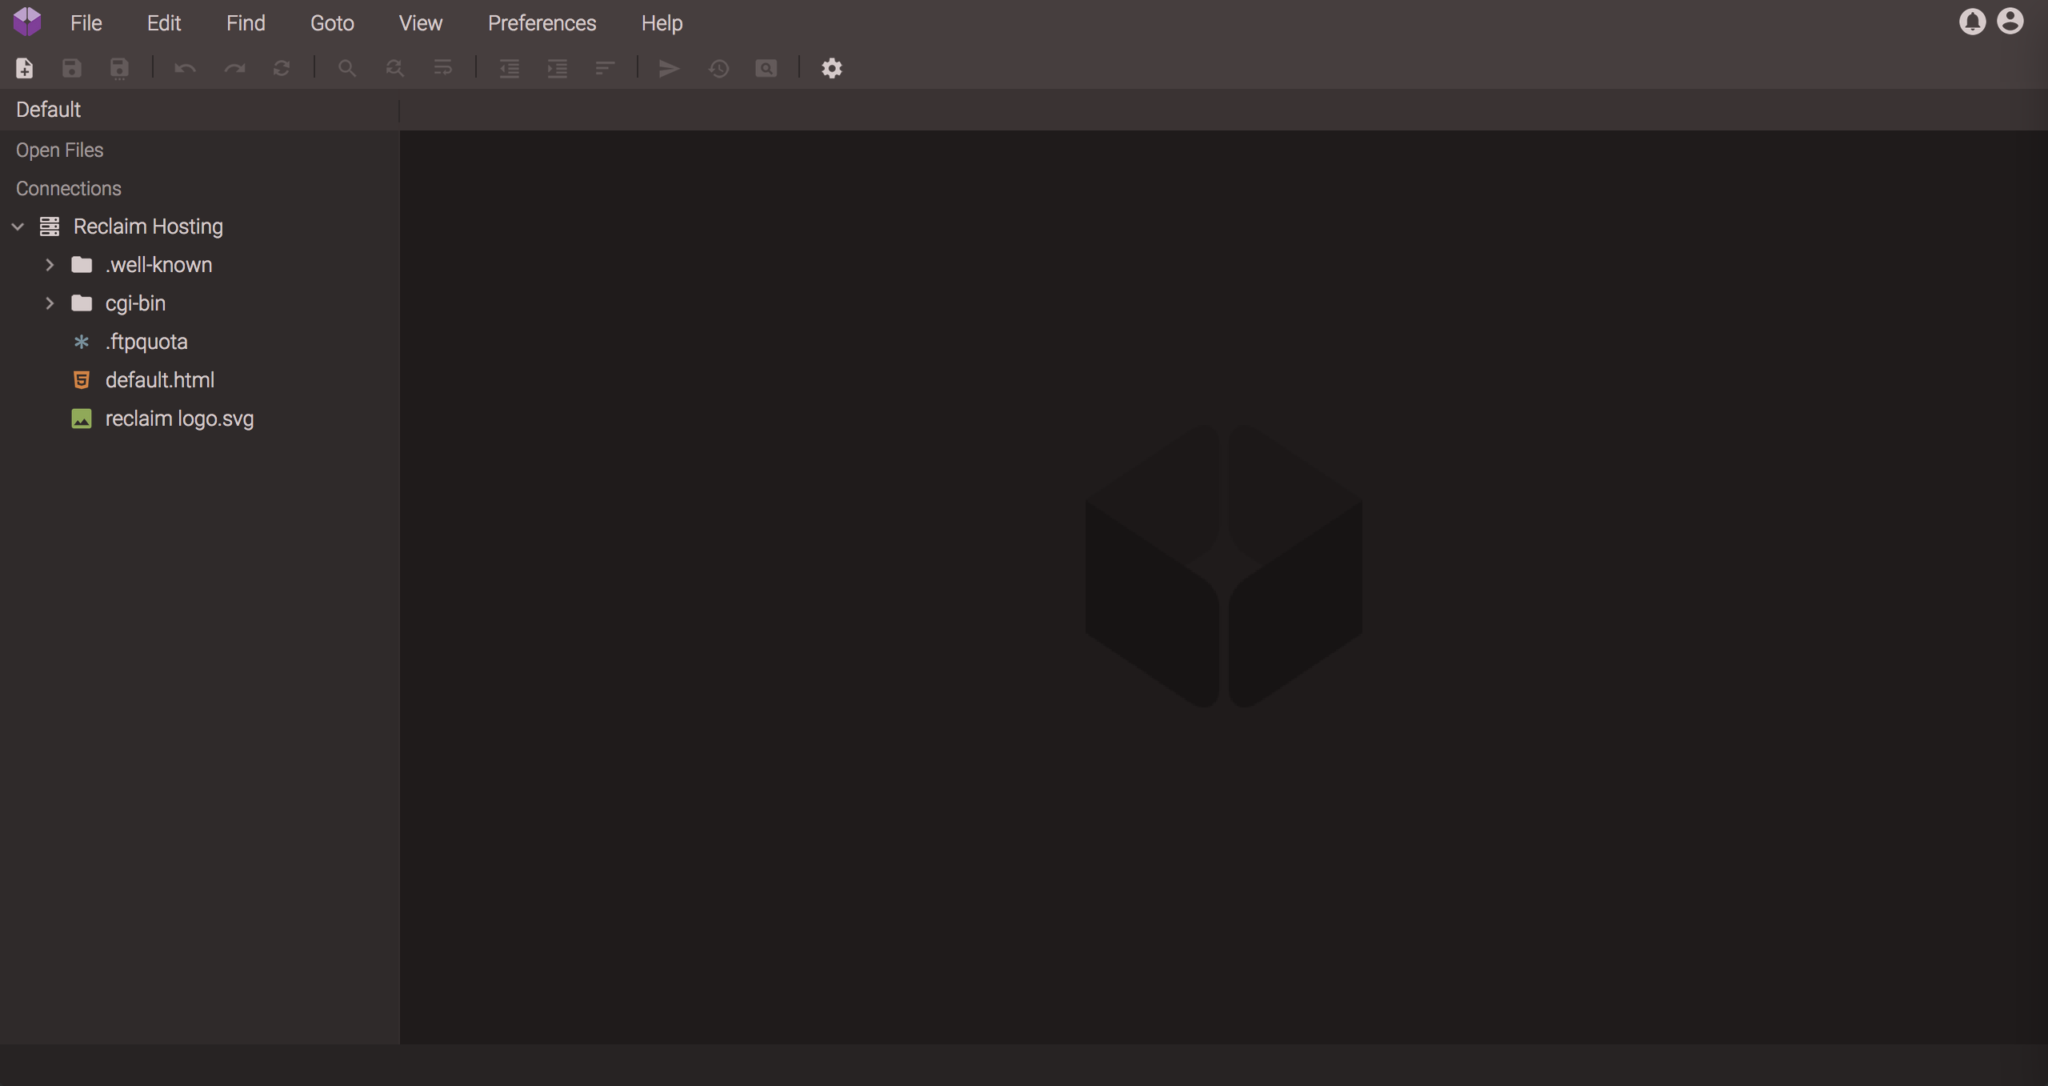
Now, click on “Reclaim Hosting” on the left. It will reveal one or more files or folders underneath it. If this is your first time using Reclaim Hosting, you should see something like this:
IMPORTANT NOTE
If you have previously set up a web site on Reclaim Hosting, especially using WordPress, then you may see a lot of other folders and files there. That’s fine.
Make sure, however, that you do not see a list of files/folders that includes a “public_html” folder. In that case, you may have missed a step in the configuration, above.
CodeAnywhere: Make and Test a “Hello World” Page
One more step is needed to configure the Root Directory.
- Right-click (or control-click) on the name “Reclaim Hosting” or “Reclaim SFTP”. A pop-up menu will appear.
- Choose “Create File” from the pop-up menu. A dialog box will appear, asking you to name the new file.
- Type in “hello-world.html”. CodeAnywhere will create a new, blank file and open it for editing.
- Type the words “Hello World”.
- Save the file, either by clicking on the “Save” icon (the second icon from the left, of a disk) or choosing “Save” from the CodeAnywhere File menu.
- Find and click on the “File Preview” icon — it’s the second from the right side, a white rectangle with a magnifying glass. This will open a new browser tab to a page with an error message.
- In the tab with the error message, look at the URL bar of your web browser. After your domain name, it will have a long set of text before it gets to the file name, something like “/home/ec#-user/ca#-rest/public_html”. Select and copy that text, including the first “/” after your domain name, but not including the last “/” before the file name you created in Step 3.
- Switch back to CodeAnywhere.
- Right-click (or control-click) on the name “Reclaim Hosting” or “Reclaim SFTP”. A pop-up menu will appear.
- Choose “Settings” from the pop-up menu. It will show you the configuration menu you saw earlier in the setup process.
- In the “Root Directory” text box, paste in the text you just copied. It should start with one single “/” and end with “/public_html”.
- Click “Save”.
You have now completed the connection between CodeAnywhere and Reclaim.